
有些应用程序只允许运行一个实例,就是在Windows资源管理器中,只允许有一个进程。我们熟悉的比如微信,钉钉等。当当前存在运行着的实例时,再次点击桌面图标或快捷方式试图启动另外一个实例时,他会将之前的实例唤醒,比如如果之前的实例窗体最小化,或隐藏到了托盘里,再次点击快捷方式,会将之前的实例弹出到界面上。
在WPF中实现单例程序有两种方式,一种是删除默认的App.xaml文件,手动编写Main主函数,控制程序的启动逻辑,还有一种是对现有的App.xaml文件进行改造,这两种方式各有优缺点,这里以我之前写的NTP时间同步小程序来详细介绍一下。

手写Main函数
在WPF中,一个进程实际上是一个Application,在这个里面可以运行Window或者Page。当新建一个WPF程序时,Visual Studio模板会帮我们创建一个默认的App.xaml文件,他其实是继承自Applicaiton的。要手动控制启动,我们先删除这个App.xaml文件(我是没有找到如何保留App.xaml的情况下添加自定义的Main函数的,但是这篇文章做到了,我用的是.NET 6.0 上的WPF,试过不行,没有App.xaml后续会有很多麻烦),然后新建一个App.cs普通的类,该类继承自Application,在里面添加Main函数,作为入口:
public class App : Application
{
    static Mutex mutex = new Mutex(true, "{93BB9177-F249-0737-8BD4-B7CB47094E3E}");
    [STAThread]
    static void Main()
    {
        App app = new App();
        if (mutex.WaitOne(TimeSpan.Zero, true))
        {
            MainWindow window = new MainWindow();
            app.Run(window);
            mutex.ReleaseMutex();
        }
        else
        {
            NativeMethods.PostMessage((IntPtr)NativeMethods.HWND_BROADCAST, NativeMethods.WM_SHOWME, IntPtr.Zero, IntPtr.Zero);
        }
    }
}
方法相当简单,首先定义一个Mutex,程序第一次启动时,WaitOne返回true,然后实例化主窗体MainWindow,然后调用app.Run,这个方法是一个阻塞的方法,他一直等到MainWindow退出才会返回,退出后就会释放mutex,在当前实例运行期间,如果再次启动,WaitOne会返回false,就会跳到调用NativeMethods里给当前的MainWindow发送消息。NativeMethods是通过PInvoke调用了一些底层方法。
internal class NativeMethods
{
    public const int HWND_BROADCAST = 0xffff;
    public static readonly int WM_SHOWME = RegisterWindowMessage("WM_SHOWME");
    [DllImport("user32")]
    public static extern bool PostMessage(IntPtr hwnd, int msg, IntPtr wparam, IntPtr lparam);
    [DllImport("user32")]
    public static extern int RegisterWindowMessage(string message);
}
接下来,要在MainWindow里面去注册这些事件,做出对应的响应,当收到发送的消息时,如果当前处于最小化或缩在托盘里,则恢复到正常窗体大小并显示。
protected override void OnSourceInitialized(EventArgs e)
{
    base.OnSourceInitialized(e);
    HwndSource source = PresentationSource.FromVisual(this) as HwndSource;
    source.AddHook(WndProc);
}
在Mainform里面,重写OnSourceInitialized方法,并注册回调方法WndProc,表示当收到消息时如何处理。
private IntPtr WndProc(IntPtr hwnd, int msg, IntPtr wParam, IntPtr lParam, ref bool handled)
{
    if (msg == NativeMethods.WM_SHOWME)
    {
        if (WindowState == WindowState.Minimized)
        {
            WindowState = WindowState.Normal;
            Show();
        }
        if (this.Visibility == Visibility.Hidden)
        {
            this.Visibility = Visibility.Visible;
            Activate();
        }
    }
    return IntPtr.Zero;
}
可以看到,当收到的消息时WM_SHOWME的时候,判断当前的状态,如果是最小化则恢复到正常状态,如果是隐藏,则显示。这样就实现了当用户再次点开应用程序的时候,先前的窗体会直接显示出来,而不是再开一个实例。
这种方法的有显示消耗的资源很少,实现起来很高效,尤其是在Winform时代,Main函数是显示存在的,只需要做一下修改即可。
这种方法的缺点也很明显,在WPF中,默认的App.xaml除了做启动入口之外,还有很多用处,比如在App.xaml中可以定义很多全局的资源或者样式,现在App.xaml文件没有了,这些动作就需要通过代码来实现。而且,没有这些全局的资源引用,在一些页面里比如MainWindow页面里,资源或样式就得不到设计时支持,当然,这些都有解决方法,这里我就来说明一下如何解决,总之比较繁琐。
我这里举我编写的时间同步程序来说明。这个程序是我WPF的练手项目,用来跟NTP授时服务器来同步本地时间,他支持多语言切换。所以它包含了多语言资源,控件样式:
<ResourceDictionary xmlns="http://schemas.microsoft.com/winfx/2006/xaml/presentation"
                    xmlns:x="http://schemas.microsoft.com/winfx/2006/xaml">
    <ResourceDictionary.MergedDictionaries>
        <!-- MahApps.Metro resource dictionaries. Make sure that all file names are Case Sensitive! -->
        <ResourceDictionary Source="pack://application:,,,/MahApps.Metro;component/Styles/Controls.xaml" />
        <ResourceDictionary Source="pack://application:,,,/MahApps.Metro;component/Styles/Fonts.xaml" />
        <ResourceDictionary Source="pack://application:,,,/MahApps.Metro;component/Styles/Themes/Light.Cyan.xaml" />

        <!-- only add at design time -->
        <ResourceDictionary  Source="Resources/Localization/StringResources.en.xaml"/>
        <ResourceDictionary Source="Resources/Localization/StringResources.zh.xaml"/>
    </ResourceDictionary.MergedDictionaries>
    <RoutedUICommand x:Key="SyncNow" />
</ResourceDictionary>
这些样式,如果存在App.xaml文件,那么直接定义在Application.Resource节点下就万事大吉了。全局都可以使用,并且能得到设计时支持。但是现在没有,所以需要在App.cs的Main函数里手动来加载。
private static void LoadResources(App app)
{
    ResourceDictionary enRresource = new ResourceDictionary();
    enRresource.Source = new Uri("Resources/Localization/StringResources.en.xaml", UriKind.RelativeOrAbsolute);
    ResourceDictionary zhResource = new ResourceDictionary();
    zhResource.Source = new Uri("Resources/Localization/StringResources.zh.xaml", UriKind.RelativeOrAbsolute);
    ResourceDictionary genResource = new ResourceDictionary();
    genResource.Source = new Uri("GeneralResources.xaml", UriKind.RelativeOrAbsolute);
    app.Resources.MergedDictionaries.Add(enRresource);
    app.Resources.MergedDictionaries.Add(zhResource);
    app.Resources.MergedDictionaries.Add(genResource);
}
这里实际上只需要加载GeneralResources文件即可,可以把语言文件从GeneralResource资源文件里面移除,但是为了得到设计时支持,这里还是房间里。
这个方法需要在Main方法里面,在MainWindow实例化前调用设置:
[STAThread]
static void Main()
{
    App app = new App();
    if (mutex.WaitOne(TimeSpan.Zero, true))
    {
        LoadResources(app);
        string lang = NtpClockConfig.Instance.Language;
        if (string.IsNullOrEmpty(lang))
        {
            lang = "zh";
        }
        LocalizationHelper.SelectCulture(lang);
        MainWindow window = new MainWindow();
        app.Run(window);
        mutex.ReleaseMutex();
    }
    else
    {
        NativeMethods.PostMessage((IntPtr)NativeMethods.HWND_BROADCAST, NativeMethods.WM_SHOWME, IntPtr.Zero, IntPtr.Zero);
    }
}
可以看到,这里除了加载资源之外,还设置了运行时的语言环境,默认选择的是中文。
接下来,因为我们没有全局的App.xaml所以不能把样式和资源放到里面,这样在设计的时候,就得不到可视化的支持,除非在窗体比如MainWindow里的MainWindow.Resource里把这些资源再引用进来,但是这样会破坏代码的结构和逻辑。
做法是添加d:标签,从而可以得到设计时支持。
<controls:MetroWindow x:Class="NTPClock.MainWindow"
        xmlns="http://schemas.microsoft.com/winfx/2006/xaml/presentation"
        xmlns:x="http://schemas.microsoft.com/winfx/2006/xaml"
        xmlns:d="http://schemas.microsoft.com/expression/blend/2008"
        xmlns:mc="http://schemas.openxmlformats.org/markup-compatibility/2006"
        xmlns:hc="https://handyorg.github.io/handycontrol"
        xmlns:controls="http://metro.mahapps.com/winfx/xaml/controls"
        xmlns:local="clr-namespace:NTPClock"
        mc:Ignorable="d"
        Icon="NTPClock.ico"
        ShowIconOnTitleBar="True"
        Title="{DynamicResource S.Title}"   Height="450"  Width="550" ResizeMode="CanMinimize" Loaded="MainWindow_OnLoaded">
    <controls:MetroWindow.IconTemplate>
        <DataTemplate>
            <!-- Setting a Margin and enable hight-quality image -->
            <Image Margin="2"
                   RenderOptions.BitmapScalingMode="HighQuality"
                   Source="{Binding}" />
        </DataTemplate>
    </controls:MetroWindow.IconTemplate>
    <Window.Resources>
        <d:ResourceDictionary>
            <ResourceDictionary.MergedDictionaries>
                <d:ResourceDictionary Source="GeneralResources.xaml" />
            </ResourceDictionary.MergedDictionaries>
        </d:ResourceDictionary>
    </Window.Resources>
</controls:MetroWindow>
可以看到有mc:ignorable="d",在Window.Resources的ResourceDictionary标签前面有d,表示在设计时支持,在运行时能忽略。这个标签运行设计师和程序员进行无缝合作,设计师使用注入Blend等设计工具,设成文件时使用d:标签来填充数据。
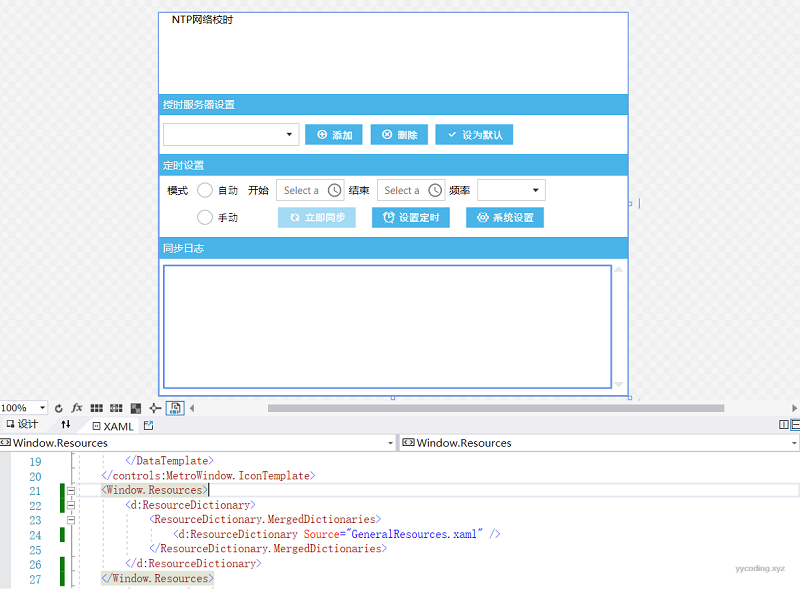 ▲使用d标签可以使得在没有全局资源或样式时,手动添加样式从而得到设计时支持
通过实现Startup方法实现
这种方法,保留了App.xaml文件,从而使得我们可以在里面添加全局资源或样式。App.xaml文件如下:
<Application  x:Class="NTPClock.App"
      xmlns="http://schemas.microsoft.com/winfx/2006/xaml/presentation"
      xmlns:x="http://schemas.microsoft.com/winfx/2006/xaml"
      xmlns:mc="http://schemas.openxmlformats.org/markup-compatibility/2006"
      xmlns:d="http://schemas.microsoft.com/expression/blend/2008"
      Startup="AppOnStartup"
      StartupUri="MainWindow.xaml" >
    <Application.Resources>
        <ResourceDictionary>
            <ResourceDictionary.MergedDictionaries>
                <ResourceDictionary Source="GeneralResources.xaml"/>
                <ResourceDictionary Source="Resources/Localization/StringResources.en.xaml"/>
                <ResourceDictionary Source="Resources/Localization/StringResources.zh.xaml"/>
            </ResourceDictionary.MergedDictionaries>
        </ResourceDictionary>
    </Application.Resources>
</Application>
可以看到我们把样式都添加到了这里,这样所有的窗体都可以直接使用,而不需要使用d标签再手动引用了。
这里需要注意的是,在xaml中我们显示定义了Startup方法,在App.xaml.cs文件中的AppOnstartup方法如下:
public partial class App : Application
{
    #region Constants and Fields

    /// <summary>The event mutex name.</summary>
    private const string UniqueEventName = "{EF308752-422F-921A-FC1C-E8D7C9368318}";

    /// <summary>The unique mutex name.</summary>
    private const string UniqueMutexName = "{D9710999-4B39-2445-7E77-12EAC02C0181}";

    /// <summary>The event wait handle.</summary>
    private EventWaitHandle eventWaitHandle;

    /// <summary>The mutex.</summary>
    private Mutex mutex;

    #endregion

    #region Methods

    /// <summary>The app on startup.</summary>
    /// <param name="sender">The sender.</param>
    /// <param name="e">The e.</param>
    private void AppOnStartup(object sender, StartupEventArgs e)
    {
        bool isOwned;
        this.mutex = new Mutex(true, UniqueMutexName, out isOwned);
        this.eventWaitHandle = new EventWaitHandle(false, EventResetMode.AutoReset, UniqueEventName);

        // So, R# would not give a warning that this variable is not used.
        GC.KeepAlive(this.mutex);

        if (isOwned)
        {
            LocalizationHelper.SelectCulture(NtpClockConfig.Instance.Language);
            // Spawn a thread which will be waiting for our event
            var thread = new Thread(
                () =>
                {
                    while (this.eventWaitHandle.WaitOne())
                    {
                        Current.Dispatcher.BeginInvoke(
                            (Action)(() => ((MainWindow)Current.MainWindow).BringToForeground()));
                    }
                });

            // It is important mark it as background otherwise it will prevent app from exiting.
            thread.IsBackground = true;

            thread.Start();
            return;
        }

        // Notify other instance so it could bring itself to foreground.
        this.eventWaitHandle.Set();

        // Terminate this instance.
        this.Shutdown();
    }

    #endregion
}
可以看到,同样是大同小异,这里也是使用了Mutex方法。这里启动了一个后台线程,当程序第一次启动的时候,会直接启动thread后return,在App.xaml里面定义了StartupUrl,WPF会启动运行MainWindow页面。当应用程序第二次试图启动时,会释放当前的mutex,接着Thread里面的eventWaitHandle会收到信号,把之前的MainWindow调到前台来显示。
MainWindow的BringToForeground方法如下:
internal void BringToForeground()
{
    if (this.WindowState == WindowState.Minimized || this.Visibility == Visibility.Hidden)
    {
        this.Show();
        this.WindowState = WindowState.Normal;
    }

    // According to some sources these steps gurantee that an app will be brought to foreground.
    this.Activate();
    this.Topmost = true;
    this.Topmost = false;
    this.Focus();
}
非常简单,这里没有第一种方法里面的那些个调用PInvoke方法,发送和处理消息等等繁琐的操作。
这种方法的缺点是他启动了一个额外的线程来处理监测当再次开启应用程序时的操作,额外增加一个线程的资源。但是他的优点多多,首先保留了App.xaml,使得我们可以将资源和样式放到里面全局可以使用从而得到设计时支持,其次他没有PInvoke方法。
总结
在某些场景下,我们需要应用程序只开启一个实例,本文介绍了WPF中单例应用程序的两种实现,一种是删除App.xaml,手写Main函数来进行启动调度,他的优点是性能相对较好,只需要定义一个Mutex即可,而且在Winform里面尤其适用。缺点是他放弃了WPF程序中App.xaml的一些默认功能,比如可以存放全局资源样式,没有App.xaml使得在某些情况下,其他的窗体除非手动引用资源或样式,否则得不到设计时支持,这两个缺点都可以通过代码或者设计时标签来回避。另外一种方法是保留App.xaml文件,注册Startup方法,在该方法里启动一个后台线程来监测多次打开的行为,当检测到试图打开多次时,将上次的应用打开,它的缺点是额外多增加了一个工作线程。相比第一种方法来说开销较大,但对于当今的CPU来说,多一个线程处理似乎可以忽略,并且这个线程里面使用的是WaitHandle,实际并不占用太多资源。但它保留了WPF为App.xaml文件提供了那些默认功能,非常值的推荐。
参考
- https://stackoverflow.com/questions/14506406/wpf-single-instance-best-practices
- https://stackoverflow.com/questions/19147/what-is-the-correct-way-to-create-a-single-instance-wpf-application
- https://docs.microsoft.com/en-us/visualstudio/xaml-tools/xaml-designtime-data?view=vs-2022
- http://sanity-free.org/143/csharp_dotnet_single_instance_application.html